It’s always 420 somewhere, right? Well at Solstrip.com it’s 420 all April long, with 10% savings across the board on all SolStrip products. Just use the code 10APRIL at checkout to secure your discount. Happy shopping!
It’s always 420 somewhere, right? Well at Solstrip.com it’s 420 all April long, with 10% savings across the board on all SolStrip products. Just use the code 10APRIL at checkout to secure your discount. Happy shopping!
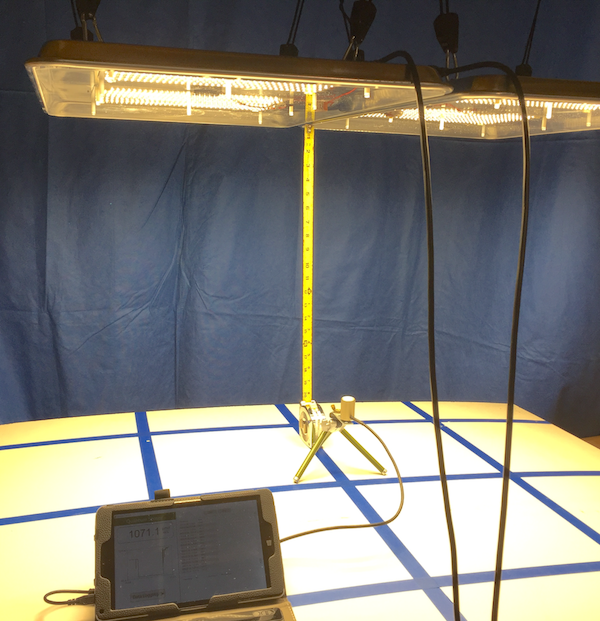
Research on different cannabis strains has determined that the optimal PPFD for cannabis is 1500 umol/m2/s-1 with supplemental CO2.
Now the key word is WITH SUPPLEMENTAL CO2.
Photosynthesis rate is a factor of 3 main measurements… available co2, PPFD and VPD (vapor pressure deficit) If all of these 3 things are at optimal levels, then cannabis will be at optimal photosynthesis. If one of these factors is limited, then the max rate of photosynthesis is much less, therefore….
IF YOU ARE NOT using CO2, then the most PPFD you really want to go is around 1000 umol/m2/s-1. Since CO2 are broken apart in the process, if you don’t have enough co2, then its quite obvious increasing light will not make a faster rate.
Most home growers and LED enthusiasts shoot for around 800-1000 umol/m2/s-1.
Ive found other light loving plants such as tomatoes have a minimum optimal DLI of around 22, which is the minimum accepted DLI for optimal conditions, therefore 22 DLI translates into roughly 510 Umol/m2/s-1 at 12/12 schedule.. .
So ideally if not using CO2, you want to stay between 500-1000 umol at the top of your canopy, across the ENTIRE canopy, not just directly centered under the panel.
Now with that being said, any light lower than 500 umol, still will flower cannabis, but it wont be at optimal levels, density and may create airy buds. Also with potency being related to intensity of light, a higher intensity will produce a more potent product.
Also, with more intensity, you will get more yield, but your gram/watt will go down. The lower the intensity, the higher the gram per watt generally.
White LEDs are like black light posters. When the UVA (black light) strikes the phosphor on the poster, the color is changed (wavelength converted) by the phosphorescent ink. It’s not a reflection, the photons are absorbed and a few nanoseconds later are emitted. When you turn off a white LED in a dark room it may look like it is still dimly lit. that is the phosphor still emitting photons.
Most all of the R&D goes into the 450nm deep blue LED. That’s why it is the most efficient LED at converting electrons to photons. There are very few uses for green other than a stop and go light. Green is the most inefficient LED only because very little R&D is spent on green phosphor.
The way an LED works is there is an anode and cathode. Both are made of silicon but they have different elemental “impurities” added. The anode impurities create a donor material and cathode an acceptor material. The impurities are typically aluminum, indium, and gallium in the form of nitrides, phosphides, and arsenides.
Electricity flows from the donor anode to the acceptor cathode. Where the two materials meet, is called the band gap. It’s not an actual gap between the materials it’s just the “region” where the two materials meet. When voltage gets high enough (≈2-3v) electrons start moving from anode to cathode crossing the band gap. As the donor electrons cross the gap and hit the acceptor holes a photon is created. It’s the elemental impurities that determine the color along with the amount of energy required to jump the gap.
The impurities used have a color where crossing the gap is most efficient. Those colors are deep blue (≈450nm) and far red (≈720nm). Deep blue impurities are indium and gallium nitrides. Red indium and gallium arsenides and phosphides.
Blue photons carry more energy than reds so it takes more energy to create blue. That is why blue LEDs are ≈3v and red are ≈2v. Far red are about 1.9v and deep red about 2.0v, and red about 2.1v. Far red has a narrower band gap. As the band gap region is made wider the color shifts due to the amount of energy required to cross the gap. In the visible wavelengths far red carries the least energy and violet the most. And the forward voltages are respective.
If there were a red phosphor converter (PC) it would have a forward voltage over 3v. If it’s a native red its voltage will be around 2v.
If you want a pure red LED the red impurities have an advantage over PC that the Vf is 2v or one third less than deep blue. It’s not likely there will be a PC red.
The phosphors in a white LED are a combination of RGB phosphors. When the wavelengths are converted the larger the difference between deep blue and the re-emitted color the less efficient the conversion becomes.
In lighting, a high CRI is closer to the light emitted from the sun than a lower CRI. Red is the least efficient phosphor being furthest from blue. Red is also the color most needed to achieve a high CRI. People naturally prefer high CRI. Lower CRI is cheaper. People are cheap. So a high efficient red is one of the most sought after phosphors. This is how Bridgelux markets their 97 CRI Decor Ultra Line.
Originally posted at RIU, and reposted here with thanks.
The most common question gardeners have when considering a SolStrip system is, how much light do they need for their space? Because LEDs are so much more efficient than high-intensity discharge (HID) and florescent lights, the traditional rules of thumb for light intensity, expressed in watts per square foot, aren’t applicable to SolStrip systems.
Current state-of-the-art white LEDs are up to 50% more efficient than HID lamps such as metal halide and high-pressure sodium lights. That huge boost in efficiency not only means more light per watt consumed, but also less heat given off by the lamp. SolStrips leverage that efficiency further with distributed diode technology, which spreads the light emitters, and the heat, across a much larger area than HID lamps or even COB lights.
Together that means that SolStrip lamp systems deliver more light per watt and can be placed much closer to the canopy, where they will deliver that light much more evenly and coolly than HID lamps. All of these factors must be considered when estimating light needs using SolStrips.
The rule of thumb you should use when planning a SolStrip system is 20-30 watts of light per square foot for vegetative spaces, and 30-40 w/sf for bloom spaces. For a mixed veg/bloom space use 35 w/sf. These are fairly broad ranges admittedly, but be wary of operating outside of them. Below 20 w/sf will result in stretching and thinning of vegetation; above 40 w/sf can lead to bleaching and die-off of tops.
This rule of thumb presumes several conditions:
Practically speaking, that means you can estimate coverage for SolStrip systems using 30 w/sf and running your system at 100% of potential output:
These are guidelines only. If you plan to run your lights softer, or higher than 12”, you’ll need to account for that in your estimate. For those willing to do a little math, there are better measures of photonic energy, i.e., light, that will deliver more accurate calculations based on values such as PAR and PFFD. We will explore those in a future post. But for basic planning in a typical indoor gardening space you can use these calculations with confidence.
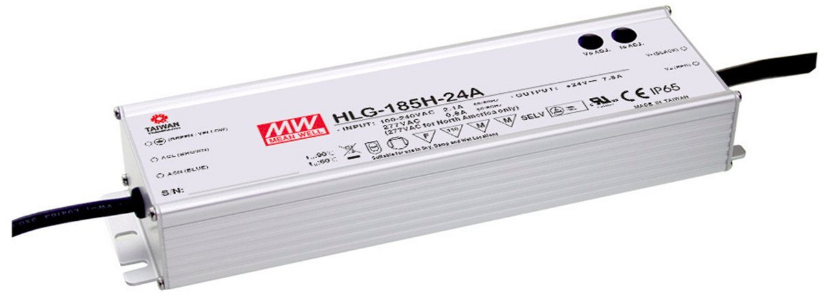
Once you’ve chosen your LED lamp design, calculated your coverage needs, and chosen your color spectrum, the next step is to decide which power supply or driver you need to power your light.
The truth is there are many possible options for your choice of driver depending on the number of strips per circuit, and the type and design of your circuits. But the mission of Photon Solutions is to bring simplicity to LED DIY, so based on a parallel-wired system, these are my basic driver suggestions:
I highly recommend getting the lower powered driver over the higher power suggestion. The physics of LED chips make them most efficient at about 70% of their rated max, or about 33-36 watts for SolStrip X2s. You can drive them at 100% if you want, presuming you keep them cooled within their operating range (I aim for 50-60C max). But you will get less than 15% more light for expending 30% more electricity. For example, while the 100w CLG will max out at a very efficient 33w/strip on at SolSheet Original, the 150w HLG will max out the strip’s 50w capacity and then some, as the HLGs tend to run about 15% above their rated power (~165w). That means you’ll end up dimming the driver down to just to operate the strips at 100% of their rated power. You will be running both the strips and the driver below their peak efficiency.
Running your strips at around 70% by using a driver which has a maximum output slightly below the total maximum rating of the SolStrip circuit (using 50w X number of strips) makes for the most efficient and cost-effective use of both the SolStrips and the driver. The LEDs are most efficient at around 2/3 of their max output, and the drivers are most efficient when run at 100% of their max output. LEDs aren’t like HID bulbs, which are optimized to run only at their maximum rated power. LEDs are more like cars, able to operate across a range of output, with a maximum and minimum wattage, and an efficiency sweet spot somewhere in-between. Aim for the sweet-spot when selecting your driver, not the maximum. You’ll save money and be more satisfied with your results.
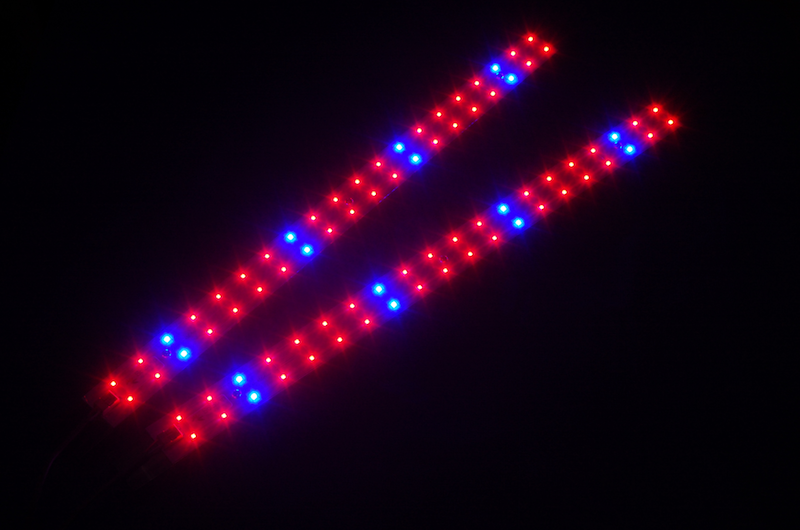
I developed SolStrips and SolSheet lamps and lamp kits in 2017 because I wanted to offer boutique and personal gardeners an alternative to poorly made, underperforming “blurple” LED grow lights and costly high-end commercial systems costing thousands of dollars. Like you, I was tired of being treated like an idiot by LED manufacturers selling their lights like snake oil salesmen, playing fast and loose with their performance claims, and refusing to offer their customers credible component specifications so that they could make informed decisions about their lighting needs.
So I began studying the technology behind LED lighting. What I found was that the technology was changing at light speed (pun intended). And blurple light makers had missed it, or chosen to ignore it, in order to sell their overpriced colored-diode lights. Blurple wasn’t the state-of-the-art at all, in terms of being the best technology for delivering a high-intensity field of plant-usable photons over a given area.
What I discovered was that virtually all the innovation in spectrum, intensity, efficiency and durability was in so-called white LEDs. Some of the largest research and development efforts in the lighting industry were being directed at creating white LEDs that not only were ultra-efficient, but could create specific spectral environments in virtually every combination in the visible spectrum. And they were doing so at twice or 3x the efficiency, and less than one-third the cost of quality mono color LEDs.
This new highly tunable and efficient LED lighting technology was first introduced as “chip-on-board” or COB, lights. COBs placed dozens of these new white diodes close together to create intense, high wattage light emitters capable of replicating the intensity of HID lamps, but at nearly twice the efficiency. Using parts purchased from electronics distributors, I built a several COB systems and tested them in a number of environments. They quickly proved their value, delivering high-quality light at the intensity that met or exceeded HID lighting, with less waste heat and much higher efficiencies.
COBs sold me on the promise of LED lighting for gardeners, especially those with smaller spaces. Not only were heat issues greatly decreased compared to HID lighting, but COB technology allowed for a much thinner vertical profile for these lights, often just a few inches. This gave small space growers precious vertical space to grow their plants, rather than waste it on reflectors, ventilation ducting, fans, air conditioners and hangers.
But most importantly, COBs allowed small space growers to move away from single-source high-intensity discharge lamps, which either needed light movers (more expense and lost vertical space) or needed to be hung high enough to light the entire canopy well yet low enough to deliver the intensity needed to produce quality yields. With COBs, hotspots under the lamp and light-deficient areas at the canopy perimeter could be reduced, and a more evenly intensive light field created. In fact, the COB systems I built that used several lower-wattage COBs seemed to produce better quality and yields than systems with just a few large high-wattage COBs.
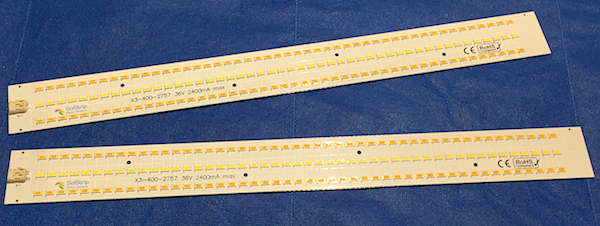
This was the epiphany that led me to the SolStrip concept: distributed diode LED technology was the future of indoor garden lighting.
The concept of distributed diode lighting is deceptively simple, yet it is lost on most lighting manufacturers. It is based on the fundamental understanding that, under natural sunlight conditions, outdoor plants receive light from multiple points and angles across the sky, constantly due to refraction of the sun’s rays through the atmosphere, and daily due to the Earth’s rotation from sunrise to sunset.
Outdoor plants are bombarded by sunlight from hundreds of angles throughout the day, and develop their structures and leaves to take advantage of this barrage of photonic energy. Yet grow light manufacturers have largely pursued the idea of creating single-point lighting systems, promoting the idea that the best solution to light a larger space is a single, larger wattage lamp. This focus on ever higher wattage single-emitter lamps has benefitted light manufacturers seeking to sell the “next year’s model” of light as ever more powerful with ever more impressive output metrics, but it flies in the face of the basic tenets of physics and botany, which states that the strongest light is the closest light, and that plants thrive best when they receive light energy from all angles rather than a single point directly above them.
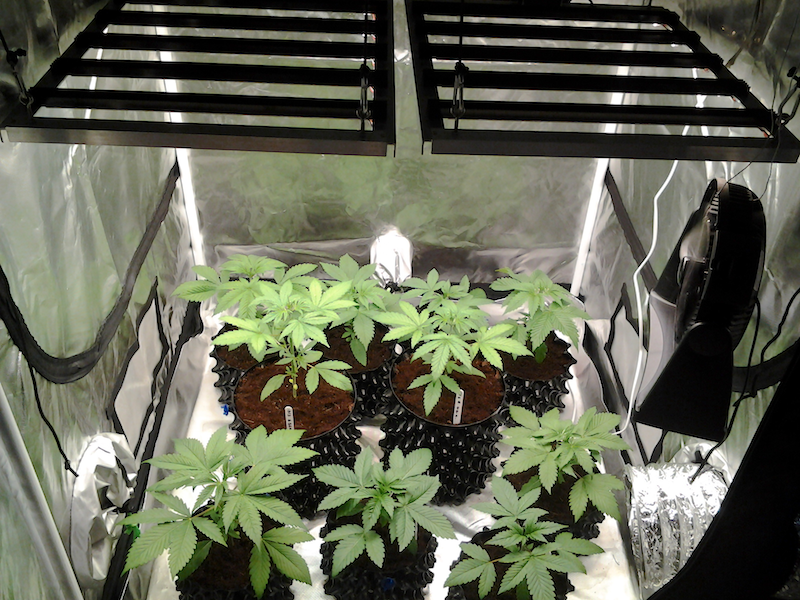
SolStrips distribute the sources of light (the LEDs) across the entire plant canopy, creating that multi-point light field that plants need to develop flowers and fruits at their most productive potential. And the waste heat that is inevitably produced by electric lighting is distributed as well, where is can be managed better, allowing the lights to be positioned much closer to the plant canopy. That increases exponentially the intensity of the light reaching the canopy, so that growers can finally achieve the goal of providing sun-like light across their garden spaces, evenly and without burning.